What is the best way to photograph rental damage in dim rooms and tight corners?
Closets, under-sink cabinets, and windowless bathrooms are where inspection photos go blurry and dark. These techniques make those spots as clear as the living room.
Why the dark corners are where disputes hide
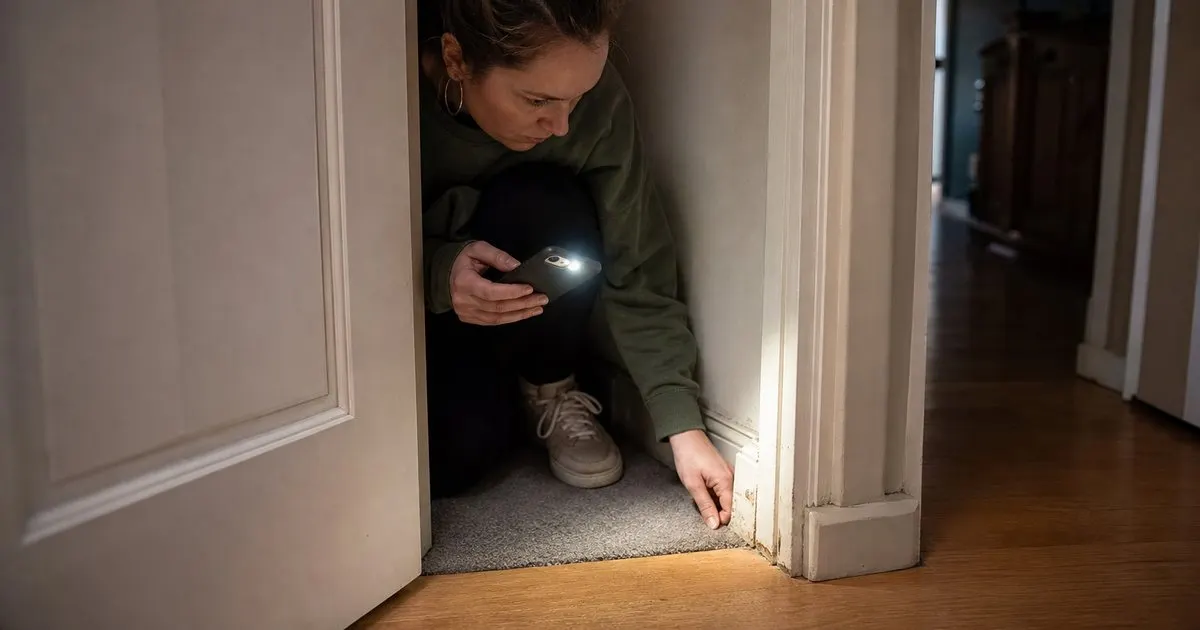
Deposit deductions cluster in places nobody photographs well: the floor of the coat closet, the cabinet under the kitchen sink, the wall behind the bathroom door, the baseboard behind the refrigerator, and the corners of a windowless bathroom. These spots are dim, cramped, and easy to skip. They are also where water damage, pet stains, mold, and scuffs collect. A tenant who left the unit in good shape and a tenant who hid a problem both benefit when the landlord's move-in photos of these areas are missing or unreadable. Related: Why do timestamped move-in photos protect landlords during security deposit disputes?
The goal is not artistic photography. It is a set of images where a stranger can tell what surface they are looking at, what condition it is in, and where in the unit it sits. That requires three things a dark corner fights against: enough light, a steady phone, and a frame that includes some context. Everything below serves those three needs.
Keep reading: Why do timestamped move-in photos protect landlords during security deposit disputes?, How should landlords document rental condition room by room before a tenant moves in?, What should a move-out inspection checklist include for a typical rental apartment?. See how MoveInSnap helps you move-in and move-out inspection photo logs.
Light the surface, not the lens
The built-in flash on a phone is a last resort. Fired straight at a glossy cabinet or a painted wall, it creates a bright hot spot in the middle and blackness at the edges, and it flattens texture so that a scratch disappears. Turn on the room lights, open every door and blind, and if that is not enough, use the phone's flashlight function held in your other hand, angled from the side at roughly forty-five degrees. Raking light from the side reveals scratches, dents, and texture that direct light hides.
A small battery-powered work light or a clip-on LED panel costs little and makes every under-sink and closet shot usable. Set it on the floor or a shelf, pointed at the wall or surface rather than at the camera. If you inspect units regularly, keep one in your inspection bag next to the tape measure. For water stains and mold, side lighting is especially useful because it shows the texture of bubbling paint or lifted laminate, which a flat photo turns into a vague shadow. Related: Which is better for rental condition records, a video walkthrough or still photos?
Hold still, get close, then back up
Low light means longer exposures, and longer exposures mean blur from a hand that is squeezed into a cabinet opening. Brace the phone against the door frame, a shelf, or your own knee. Tap the screen on the defect to lock focus and exposure, and take two or three frames of each shot rather than one, because the first frame after a tap is often the softest. Review the image right there; a blurry photo discovered at move-out is the same as no photo. Related: How do landlords compare move-in and move-out photos to prove real damage?
For each defect, take a pair of images: a close-up that shows the damage clearly, and a wider frame that shows where it is. A close-up of a dark stain proves nothing without a wider shot placing it on the left side of the hall closet floor. If the spot is deep in a cabinet or behind an appliance, add a third image from the doorway showing the cabinet or appliance itself so the location chain is complete.
Use scale, labels, and consistent framing
In a dim, cramped photo, a scratch can look like an inch or a foot. Put something of known size next to it: a tape measure with the numbers visible, a coin, or a business card. A tape measure is ideal because it is neutral and obviously sized. Note the room and item as you go, either by speaking it into a voice memo or by labeling the photo in an app that keeps the label with the image, so the shot never becomes an anonymous dark rectangle in a camera roll.
At move-out, you will want to reshoot the same corners from the same spots. Standing in the doorway of a closet and shooting down and left is easy to repeat. Kneeling in an awkward crouch at some random angle is not. Framing consistently at move-in is what makes comparison possible later. This is one reason MoveInSnap prompts by room and item: the prompts nudge you to cover the same dark corners every time, in the same order, so the move-out shot has a twin. Related: How should landlords document rental condition room by room before a tenant moves in?
- Closets, under-sink cabinets, and windowless bathrooms are where damage hides and photos fail.
- Light surfaces from the side with a flashlight or small LED panel instead of firing the built-in flash.
- Brace the phone, lock focus on the defect, shoot several frames, and check each one before moving on.
- Pair every close-up with a wider context shot and include a tape measure for scale.

Julien Jimenez
Julien Jimenez is an independent software builder based in Paris. He designs, ships, and operates focused SaaS products for small businesses and independent professionals. Read the full author page.
Prove condition with dated photos
Move-in and move-out inspection photo logs. MoveInSnap is built to help you put this into practice.
Start freeMore from the MoveInSnap blog
Why do timestamped move-in photos protect landlords during security deposit disputes?
How should landlords document rental condition room by room before a tenant moves in?
What should a move-out inspection checklist include for a typical rental apartment?
Get the MoveInSnap playbook
Practical guides on move-in and move-out inspections, straight to your inbox as we publish them. No spam, unsubscribe any time.